

Nursery bedding has come a long way. Now more than ever, parents have options beyond the plain white, pink, blue and polka dot baby crib sheets that previously dominated the market. But sometimes those adorable trendy printed sheets can be out of your budget or you simply cannot find the perfect Star Wars-themed bedding for your mini Jedi. The good news is that even if you’re a beginner behind the sewing machine, you’ll find it’s a snap to DIY a crib sheet as unique as your nursery style.
Materials: two yards of fabric (minimum 44″ width), 80″ length of 1/4″ elastic, cardstock (or poster board), two small safety pins, sewing machine, thread, scissors, iron
Please note that the following tutorial fits standard U.S. crib mattresses 27-28″ wide, 51-52″ long, and 3-6″ deep and should not be used on any other size mattress.
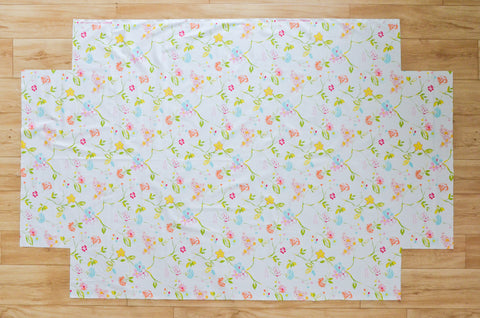
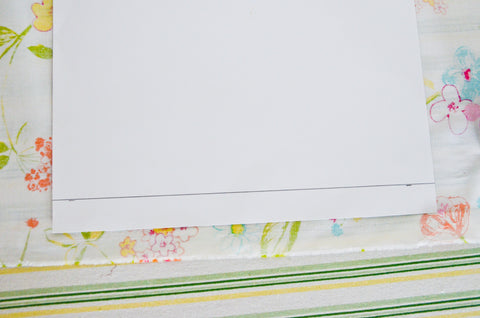
Begin with a fabric rectangle that measures 68″ x 45″. If your fabric comes 44″ wide, that’s okay too—just be sure to keep the salvage edges intact for maximum width.
Cut an 8″ square template out of cardstock or poster board. Align the template with one corner of your fabric, trace and cut out the corner.
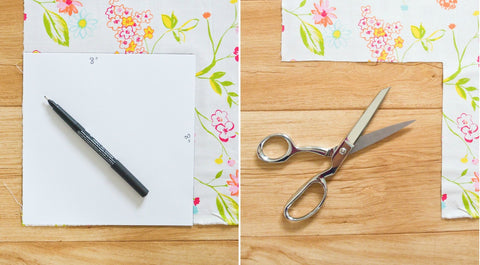
Repeat on the remaining three corners until your fabric looks like this.
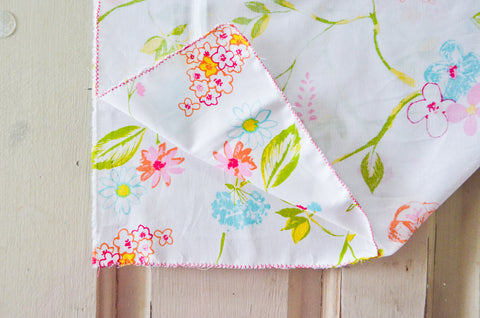
Run a zigzag stitch around all the raw edges of your fabric to prevent fraying. (I used bright pink thread for easy visibility, but you’ll want to use thread that coordinates with your fabric.)

If you are worried your fabric may shrink significantly when washed, you can wash your fabric before moving onto the next step.
Align the edges of your cut corners, right sides of the fabric together. Pin and sew the corner with a 5/8″ seam allowance. Do this on all four corners. Don’t forget to back-stitch the beginning and the end of your seam for strength.


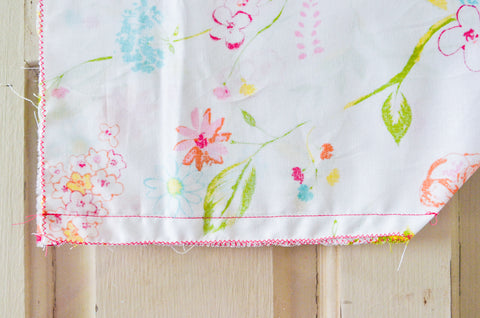
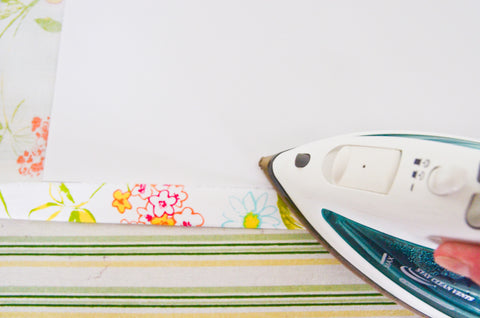
Next, you’ll need to create a small casing along the edge for the elastic. Use a hot iron to crease a 5/8″ flap around the entire edge of the fabric (wrong sides together). One easy way to quickly iron a consistent crease is to draw a line 5/8″ up from the long edge of a piece of cardstock. Then fold the fabric against the edge of the cardstock template up to the line, and press with your iron.

After creasing the entire edge, at the center of one long side, mark a starting point (one pin) and stopping point (two pins) that are 2″ apart.

Because you ironed the casing flap, you won’t have to pin around the entire sheet—it should fold over nicely on its own as you sew. Starting where you marked the fabric with one pin, sew all the way around the sheet (wrong sides together) with a 1/2″ seam allowance.
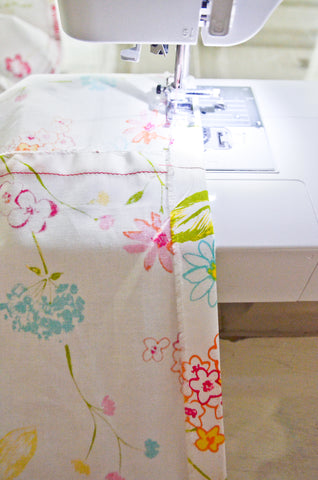
Stop at your two pins mark, leaving a small opening in the casing.
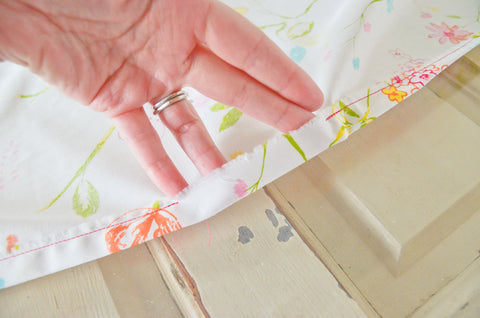
Cut an 80″ length of 1/4″ elastic. Pin one end to the sheet (so it doesn’t pull through) and attach another safety pin to the free end.

Insert the free end of your elastic into the casing and thread it all the way through to the other side of your opening.
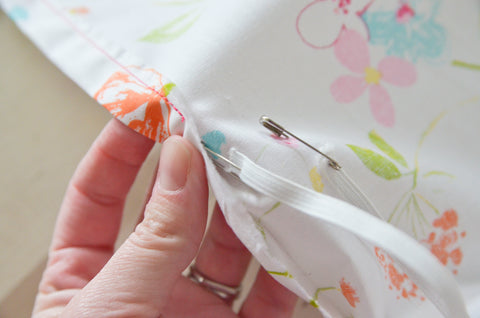
Overlap your elastic ends about 2″. Sew them together a couple times with a tight zigzag stitch.
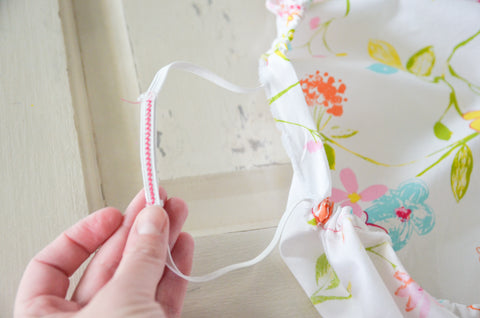
Pull the elastic back into the casing and sew the opening shut.
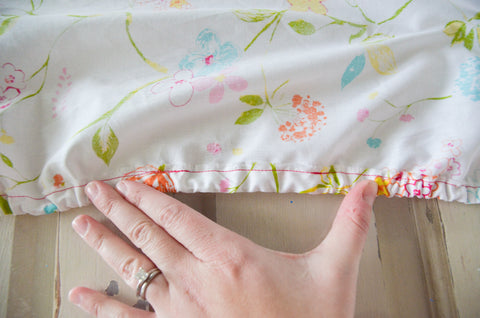
All done! Your new crib sheet should fit snugly, with the gathered elastic edges tucked neatly underneath the mattress. Never place an infant in a crib with loose bedding.
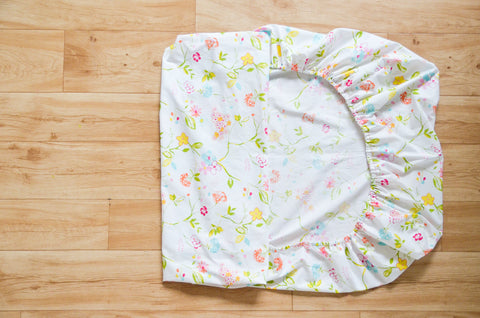
The best part about making crib sheet, other than its simplicity, is that the possibilities for customization are literally endless! And now that you know how to make a crib sheet, you also know how to whip up a custom toddler bed sheet—it’s the same size mattress.